Mass reduction of image size and image compression without loss of original image quality helps users save a lot of time and effort when reducing the size of the entire image folder.
Image compression will be significant if you need to make a website because it is one factor that reduces the website’s loading speed; I will have a more detailed post on this topic.
Let’s immediately refer to 3 ways to reduce the image size quickly and keep the quality introduced below!
01. Use the Online Compressor page
This is the most common method if your need to compress images is small & do not want to install any additional software on your device; many sites support image compression, such as:
The strength of these online image compression sites is that you will not need to think much about installing additional software on your computer, and they are simple operation; However, there will be limitations that it is not suitable for a large number of images, slow transmission speed, or need to compress images with large sizes (from several tens of MB or more).
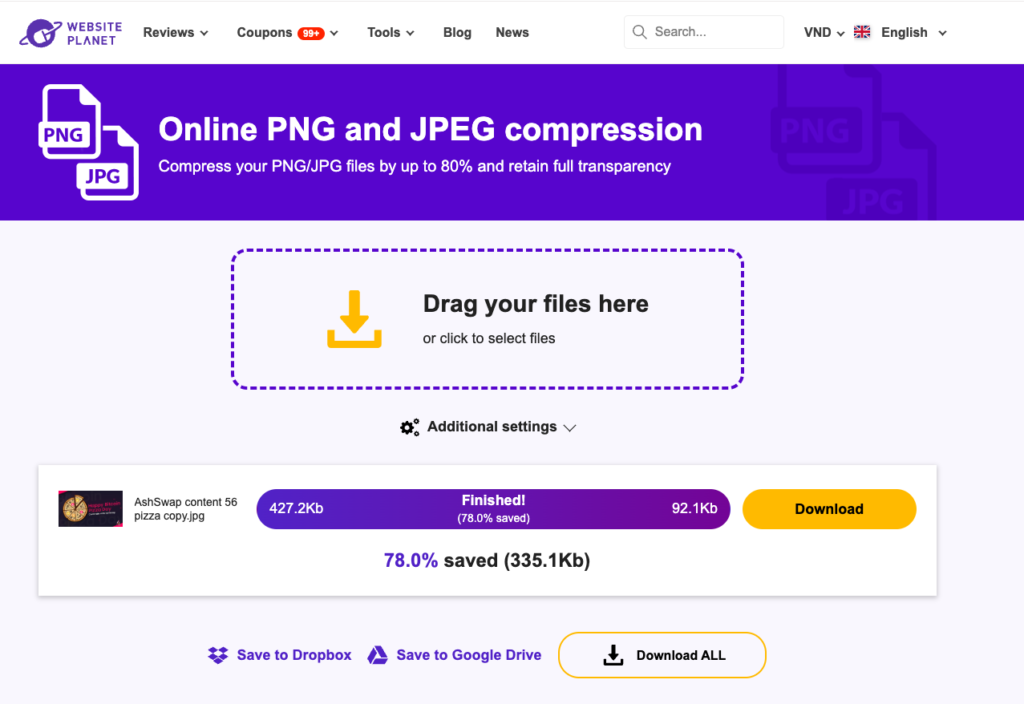
Another website you can try is https://www.websiteplanet.com/webtools/imagecompressor/.
I received suggestion from a reader of mine and it’s quite good as you can see in the screenshot below.
02. Plugin WordPress Imagify
If you are using WordPress as a CMS for your website, then there is an excellent WordPress plugin, Imagify, which will help you automatically optimize images as soon as you upload them as usual, without any extra work. In addition, Imagify can also compress images already in your Gallery, helping improve page load speed.

03. Caesium Compressor Software
Caesium is an application specialized for compressing batch images quickly & without much change in quality; In addition to the automatic image compression function, users can customize the image quality and size as desired.
The reasons why i choose Caesium:
- Friendly User Interface.
- It’s free.
- High compress quality.
- Post-compressed image quality is High.
You can download and install Caesium here: https://saerasoft.com/caesium/
Main Interface:
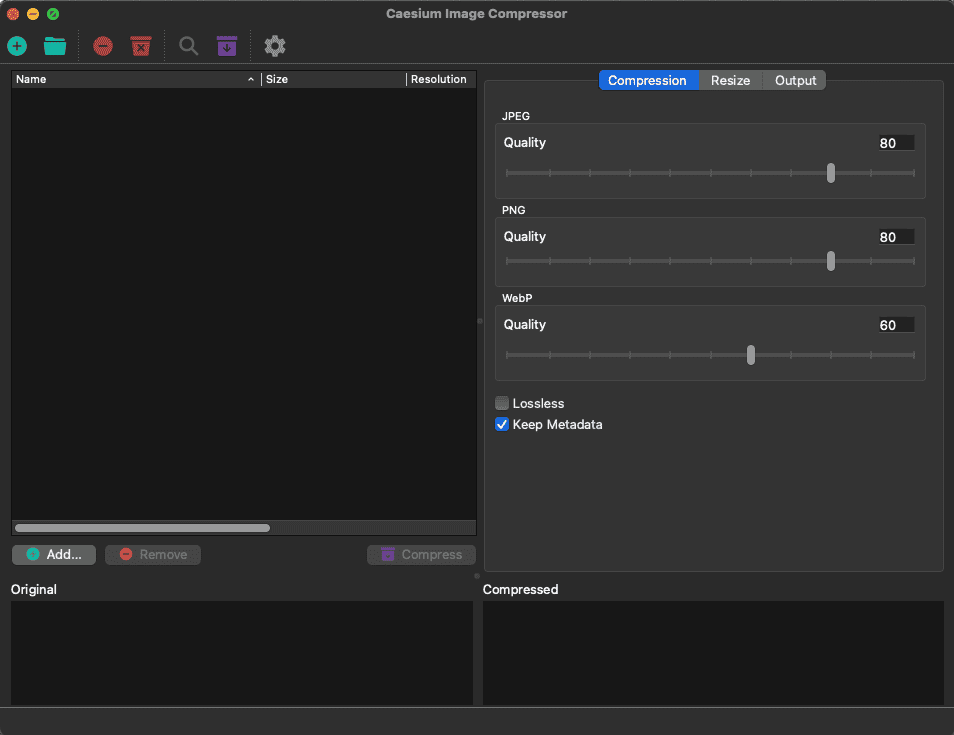
To compress images with Caesium software, you can follow these steps:
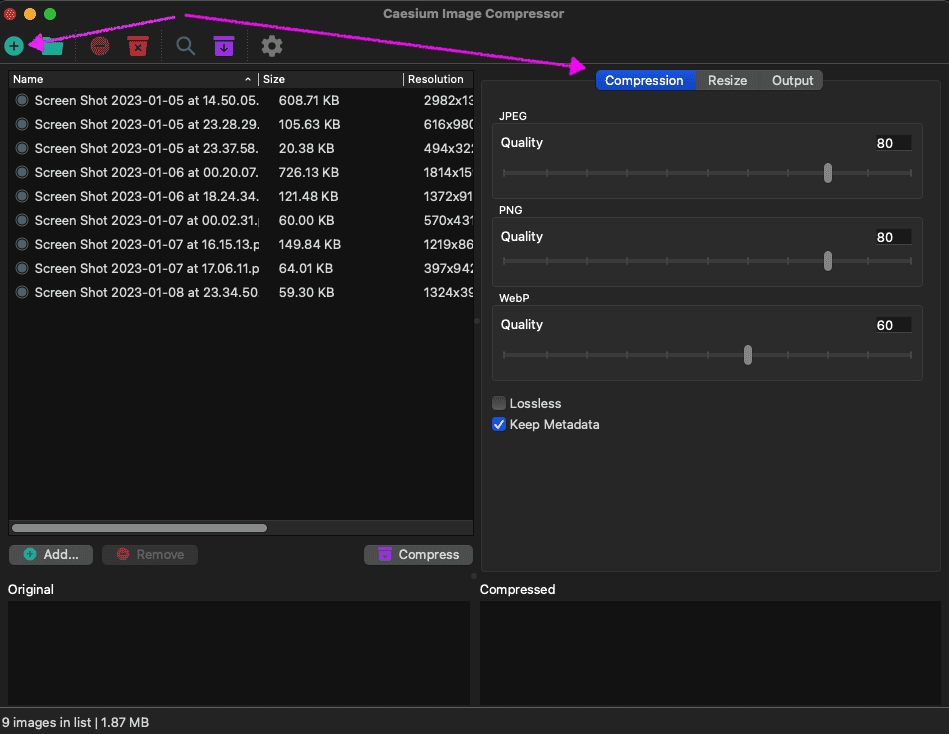
Step 1: Add the image to compress by clicking the Open Files icon; you can drag and drop the image into the left area, as shown in the figure.
You can leave the Compression section as default or adjust it according to your liking, the higher the Quality, the closer the image quality will be to the original image, and the image compression will also decrease.
Step 2: Click Compress for the software to compress the image; the compressed image will default to be in the same folder as the original image with the “compressed” suffix.
As you can see, my nine images were compressed from 1.87MB to 381.64KB, reducing 80%; impressive.
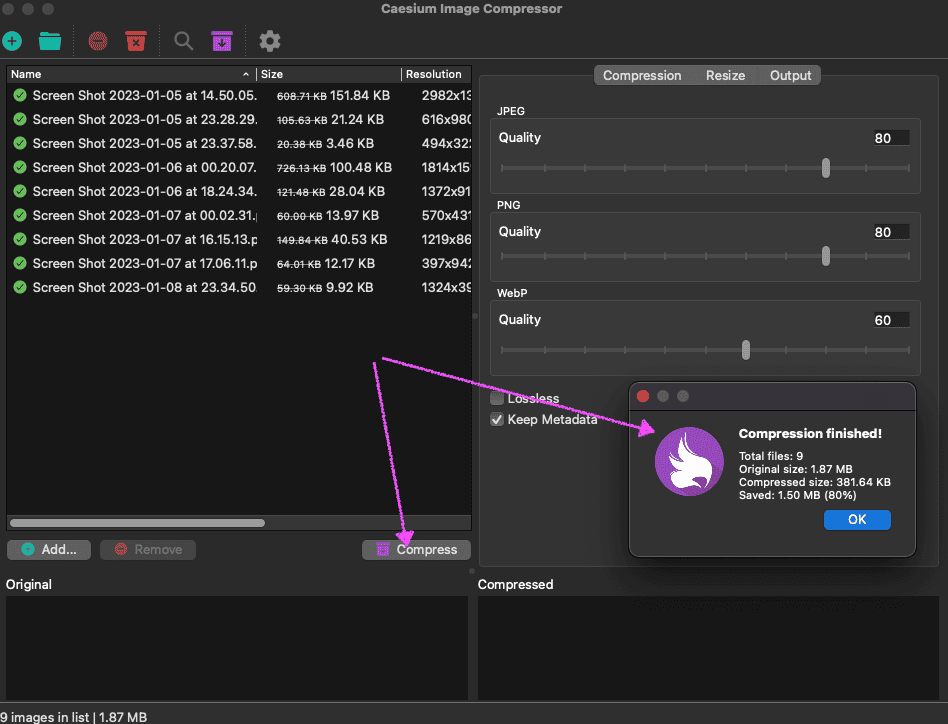
Image Size Options: you can choose the image size if you want to resize it dynamically; There are many options for you to choose from:
- Dimension: fill in Width & Height
- Percentage: size ratio to the original image
- Short Edge: fill in the length of the short side of the image, the longer side will automatically adjust to the ratio
- Long Edge: similar to Short Edge
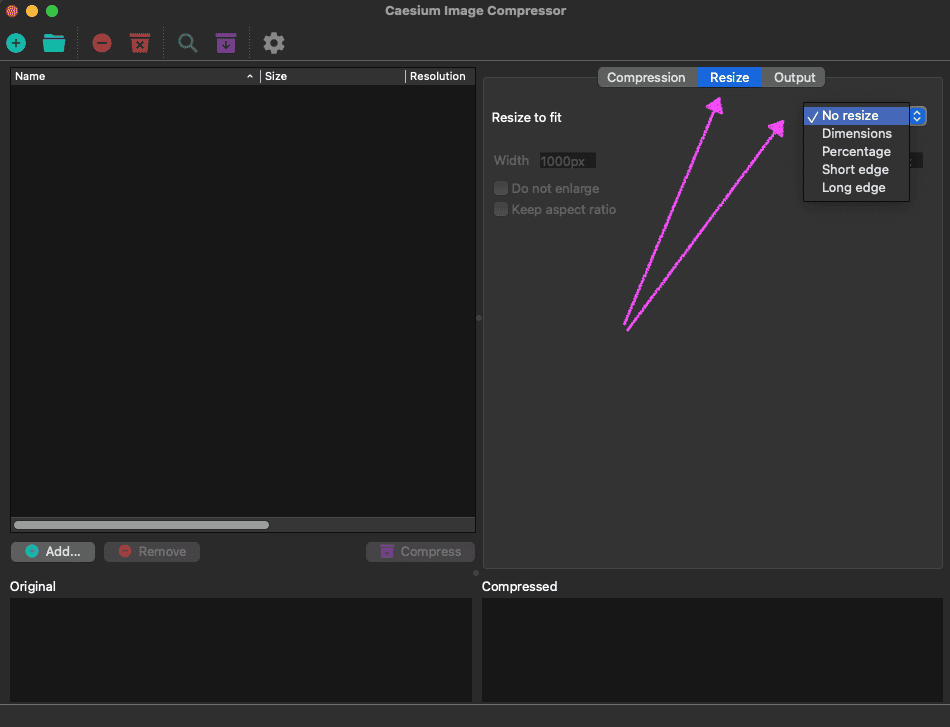
Image Output option:
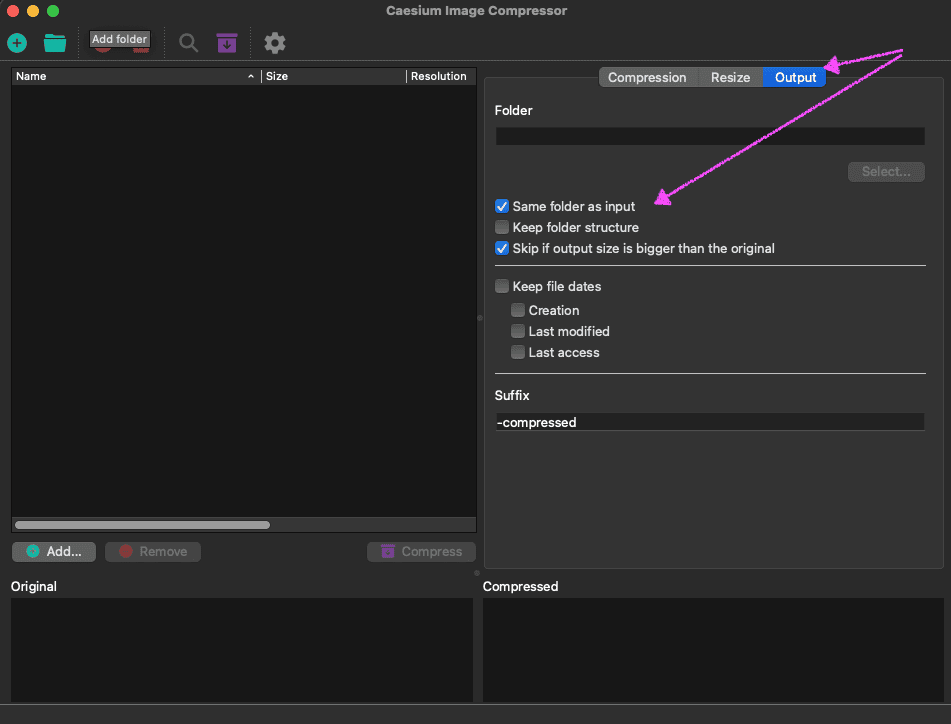
- You can choose the folder path you want to store the compressed images, don’t forget to tick “Keep folder structure” if you want to use that path later without changing.
- Suffix: added at the end of the file name
Conclusion
The above are effective ways to reduce image size that I have learned in working.
I hope the article has helped you in editing photos.


